Growing your own potatoes is a rewarding experience that provides fresh, tasty produce straight from your garden or allotment. Whether you have ample space or are using containers in a smaller area, planting potatoes is easier than you might think. This guide will walk you through each step, from selecting the right seed potatoes to harvesting your crop.
In a nutshell: stand your seed potatoes somewhere light and cool to sprout in late winter, plant them in the ground or a big pot in spring, pile soil up around the shoots as they grow, and dig up your potatoes from June (new potatoes) to October (big ones for storing).
- DifficultyEasy, and fun with children
- Plant to harvest10–20 weeks, depending on the type
- WhereFull sun, in the ground or a big pot
- Spacing30–40cm apart, rows 60–75cm
- In a pot2–3 seed potatoes per 40-litre pot or bag
The growing year
When to grow it
- First earlies: plant out: March to April
- First earlies: harvest: June to August
- Second earlies: plant out: April to May
- Second earlies: harvest: July to September
- Maincrop: plant out: April to May
- Maincrop: harvest: September to October
Before you start
What you'll need
- Seed potatoes Not supermarket potatoes: seed potatoes are grown to be free of disease.
- Egg boxes or seed trays To stand the seed potatoes in while they sprout.
- A light, cool, frost-free place A windowsill in a cool room, a porch, or a shed with a window.
- A sunny bed, or a big pot or potato bag A pot or bag needs drainage holes and to hold at least 30–40 litres of compost.
- Garden compost or well-rotted manure To dig in before planting: potatoes are hungry.
- A spade and a fork A spade for planting and earthing up, a fork for digging them up.
- Horticultural fleece Optional: to cover young shoots if a late frost is forecast.
Step by step
How to grow potatoes
Late January to March
Let them sprout
When your seed potatoes arrive, stand them in egg boxes or trays with the end that has the most small buds, called eyes, facing up.
Keep them somewhere light, cool and frost-free, around 10°C, like a windowsill in a cool room or a porch. Over four to six weeks they grow short, sturdy shoots. This is called chitting.
Tip: Chitting gives first and second earlies a head start. Long, pale, floppy shoots mean the spot is too dark or too warm.
You'll know it's working when each potato has a few short, dark green or purple shoots, about 2cm long.
March to April
Get the ground ready
Pick a sunny spot. Dig the soil over, taking out weeds and big stones, and dig in plenty of garden compost or well-rotted manure.
Try not to plant where potatoes or tomatoes grew in the last couple of years: the same pests and diseases build up in the soil.
March to May (see the calendar for each type)
Plant them
Plant first earlies from mid-March, and second earlies and maincrop in April. Dig holes or a trench about 12–15cm deep, set each seed potato in with its shoots pointing up, and cover it with soil.
Space first and second earlies 30cm apart in rows 60cm apart. Maincrop plants grow bigger, so give them about 40cm, in rows 75cm apart.
Tip: In a pot or bag: put 10cm of compost in the bottom, set 2–3 seed potatoes on it, and cover them with another 10cm. Keep adding compost as the shoots grow, until the pot is full.
You'll know it's working when leafy shoots push through the soil in two to four weeks.
April to June
Earth them up
When the shoots are about 20cm tall, pull soil up around them with a spade or hoe, leaving just the top few leaves showing. Do it again every few weeks, until you have a ridge about 30cm high. This is called earthing up.
It gives the new potatoes more room to grow, stops the ones near the surface turning green in the light (green potatoes are poisonous), and protects young shoots from frost.
Tip: If frost is forecast while the shoots are still small, pull soil over them or cover the bed with fleece overnight.
You'll know it's working when you have long, low ridges of soil with bushy green tops.
May to August
Water in dry spells
Water when the weather is dry, especially once the plants flower: that’s when the potatoes underneath are swelling. A good soak once a week is better than a sprinkle every day.
Potatoes in pots dry out quickly, so check them every day or two in warm weather, and give them a liquid feed every couple of weeks.
You'll know it's working when the plants stay green and upright, and flowers appear.
June to October
Dig up your potatoes
First earlies are ready from June, about ten weeks after planting, often when the flowers open. Second earlies follow from July. Maincrop potatoes are ready from September, once the leaves have turned yellow and died down.
Push a fork into the ground well away from the plant, so you don’t spear the potatoes, and lift the whole plant. Feel through the soil for any you missed. In pots, just tip them out.
Tip: Not sure if they’re ready? Scrape away a little soil and look. Earlies the size of a hen’s egg are ready; if they’re smaller, give them another week or two.
You'll know it's working when you lift a cluster of smooth, clean potatoes.
After digging
Eat and store
New potatoes (earlies) are at their best eaten within a few days of digging.
For maincrop to store, cut off the dead leaves two weeks before you dig, so the skins firm up. Leave the potatoes to dry on the soil for a few hours, then keep them in paper or hessian sacks somewhere cool, dark and frost-free. They’ll keep for months.
Tip: Keep stored potatoes in the dark: light turns them green.
Choosing what to grow
Which variety should I grow?
- First earliesThe quickest: planted in March and ready from June, about ten weeks later. Small, tender new potatoes for eating fresh. They're usually dug before blight strikes, and they're the best kind for pots.
- Second earliesPlanted in April and ready from July, about 13–15 weeks later. Salad potatoes like Charlotte are second earlies. A little bigger than first earlies, and they keep for a few weeks.
- MaincropPlanted in April and dug from September, about 20 weeks later. Big potatoes for roasting, mash, baking and chips, which store all winter. They need the most space.
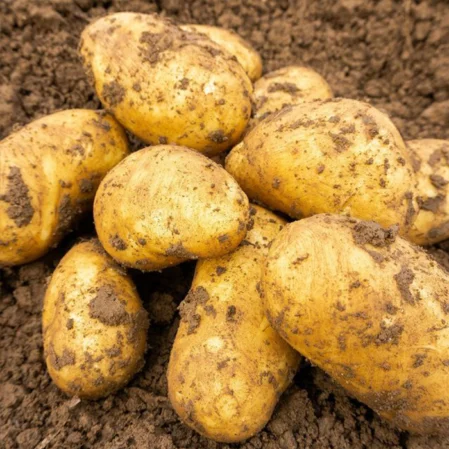 Best for beginnersCharlotte Seed Potatoes (Second Early)Second early, waxy: good for salads, boiling and roasting. Good at resisting blight.
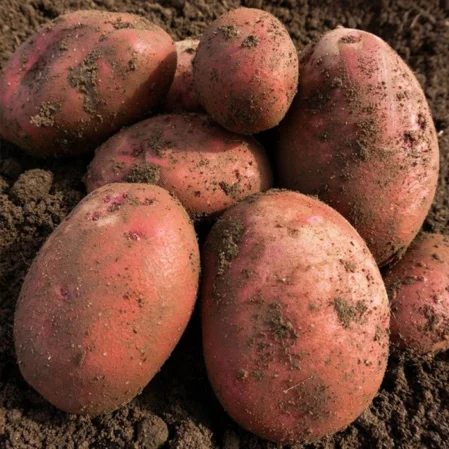 Red Duke of York Seed Potatoes (First Early)First early, floury: good for boiling, roasting and mash.
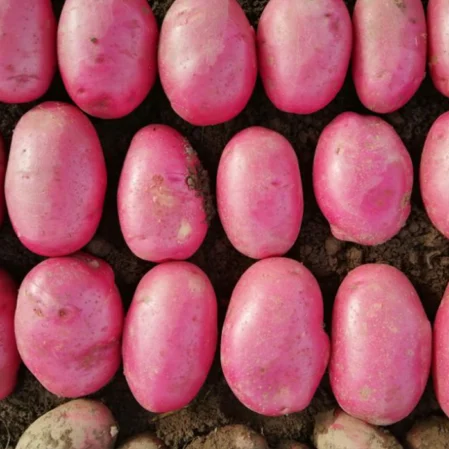 Caledonian Rose Seed Potatoes (Maincrop)Maincrop, all-rounder: good for boiling, roasting, chips, mash and baking.
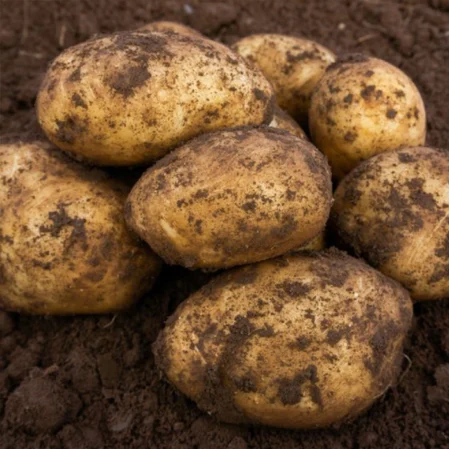 Caledonian Pearl Seed Potatoes (First Early)First early, waxy: good for salads and boiling.
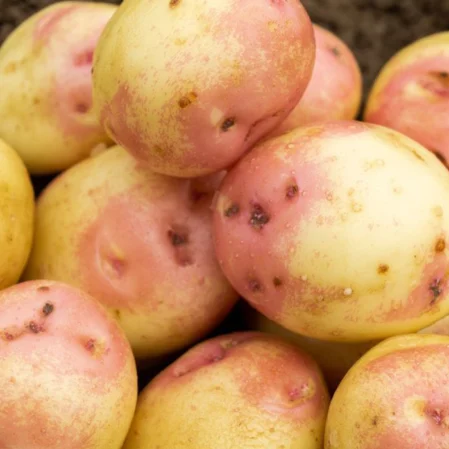 King Edward Seed Potatoes (Maincrop)Maincrop, floury: good for roasting, chips, mash and baking.
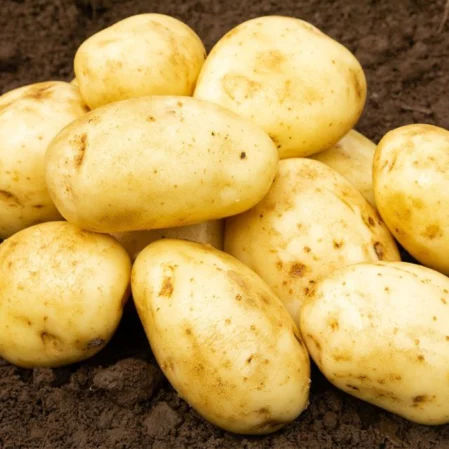 Maris Piper Seed Potatoes (Maincrop)Maincrop, floury: good for roasting, chips, mash and baking.
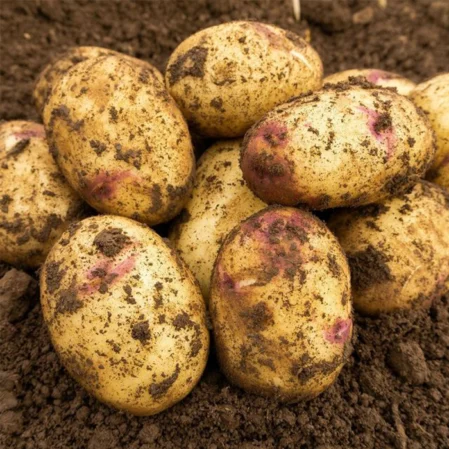 Kestrel Seed Potatoes (Second Early)Second early, waxy: good for boiling, roasting, chips and mash.
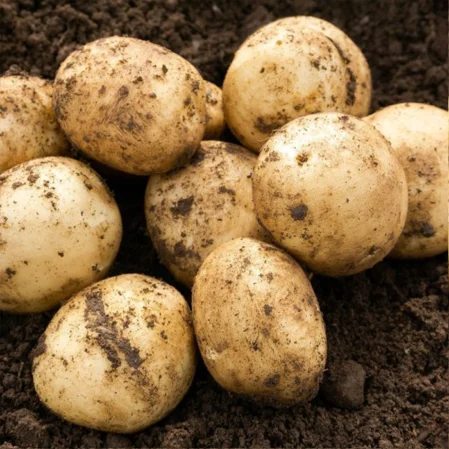 Pentland Javelin Seed Potatoes (First Early)First early, waxy: good for salads and boiling.
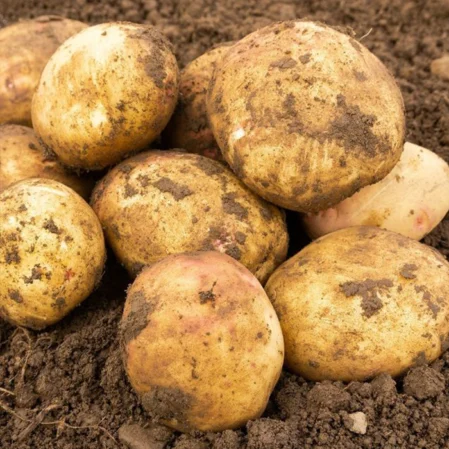 Cara Seed Potatoes (Maincrop)Maincrop, all-rounder: good for boiling, roasting, mash and baking. Very good at resisting blight.
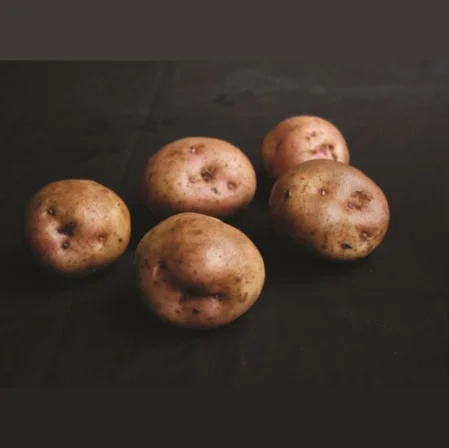 Kerrs Pink Seed Potatoes (Maincrop)Maincrop, floury: good for boiling, roasting, chips and mash.
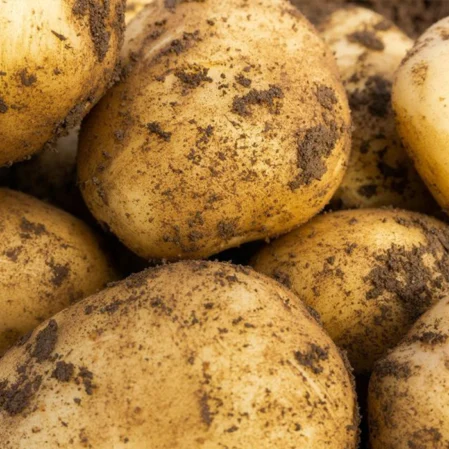 Wilja Seed Potatoes (Second Early)Second early, all-rounder: good for boiling, roasting, mash and baking.
- See all 32 varietiesBrowse them all
Jargon buster
Words explained
- Seed potatoA small potato grown for planting and checked to be free of disease. Each one grows into a plant with lots of new potatoes.
- EyeA small bud on a potato's skin. The shoots grow from the eyes.
- ChittingLetting seed potatoes grow short shoots in a light, cool place before planting.
- First early, second early, maincropHow quickly a variety is ready: from about 10 weeks after planting to about 20.
- Earthing upPulling soil up around the stems as they grow.
- TuberThe potato itself: a swollen underground stem where the plant stores food.
- HaulmThe leafy stems of a potato plant.
- WaxyFirm, smooth potatoes that hold their shape: best for salads and boiling.
- FlourySoft, fluffy potatoes: best for roasting, mash, chips and baking.
- BlightA disease that spreads in warm, wet summer weather and turns the leaves brown.
- Crop rotationGrowing each crop in a different spot each year, so pests and diseases don't build up.
If things go wrong
Problems and fixes
Brown patches on the leaves that spread fast
Why: Blight, a disease that arrives in warm, humid weather, usually from July.
What to do: Cut off all the leaves and stems at ground level as soon as you see it, and bin them (don't compost them). Wait two weeks, then dig up the potatoes and keep only healthy-looking ones. Earlies and blight-resistant varieties usually escape it.
Rough, scabby patches on the skin
Why: Common scab, which is worst in dry, sandy or chalky soil.
What to do: Water regularly while the potatoes are forming, and don't add lime. Scabby potatoes are fine to eat once peeled.
Small holes tunnelled through the potatoes
Why: Slugs or wireworms. Wireworms are worst in ground that was recently lawn.
What to do: Dig maincrop potatoes as soon as they're ready rather than leaving them in the ground, or grow them in pots.
Green patches on the potatoes
Why: They grew too close to the surface, or were stored in the light.
What to do: Earth up well and store in the dark. Cut away any green before cooking, and throw away very green potatoes: the green parts are poisonous.
Lots of leaves but few potatoes
Why: Too much rich feed or fresh manure, too little water, or not enough sun.
What to do: Use well-rotted manure or a potato fertiliser, water in dry spells once the plants flower, and plant in full sun.
Shoots blackened after a cold night
Why: Frost.
What to do: Don't worry: new shoots usually grow back. Next time, earth up or cover the plants with fleece when frost is forecast.
Good to know
Questions people ask
Can I plant potatoes from the supermarket?
It’s best not to. They may carry disease, and some are treated to stop them sprouting. Seed potatoes are grown to be healthy, and give a much better crop.
Do I have to chit seed potatoes?
No, but it helps, especially for first and second earlies: chitted potatoes are ready a week or two sooner. Maincrop potatoes can go straight in.
Can I grow potatoes in pots or bags?
Yes, and it’s a great way to start. Use a pot or potato bag of at least 30–40 litres with drainage holes, plant 2–3 seed potatoes, and keep adding compost as they grow. First and second earlies do best in pots.
How many potatoes will I get?
Roughly half a kilo to a kilo from each first early plant, and up to twice that from maincrop, depending on the weather and your soil.
Can I eat the berries that grow after the flowers?
No. Potato plants sometimes make small green berries that look like tomatoes. They’re poisonous, so pick them off if children are around.
More about growing potatoes
What Are Seed Potatoes?
Seed potatoes are specially grown tubers meant for planting, not eating. Unlike potatoes from the supermarket, seed potatoes are certified disease-free. This certification ensures you won’t introduce harmful pests or diseases into your garden or allotment. Starting with quality seed potatoes leads to healthier plants and a better harvest.
Why Avoid Planting Shop-Bought Potatoes?
While it might be tempting to plant sprouting potatoes from the shop, it’s best to avoid this. Shop-bought potatoes can carry diseases like blight or scab, which can infect your soil for years. They may also have been treated to prevent sprouting, making them unsuitable for planting. By using certified seed potatoes, you protect your garden’s health and improve your chances of a successful harvest.
Types of Potatoes: First Earlies, Second Earlies, and Maincrop
Understanding the different types of potatoes helps you plan your planting and harvesting times effectively.
First Earlies
- Planting Time: Late March or early April
- Harvest: June or July (about 10 weeks after planting)
- Popular Varieties: Some popular options are Swift and Rocket
First Earlies are the quickest to grow, making them ideal if you’re eager for a fast harvest. These potatoes are small and tender, perfect for salads and boiling, giving you an early taste of the season.
Second Earlies
- Planting Time: Early to mid-April
- Harvest: July or August (around 13-15 weeks after planting)
- Popular Varieties: Common choices include Kestrel and Charlotte
Second Earlies take a bit longer to mature and are slightly larger. They’re versatile in the kitchen, suitable for boiling, roasting, or making into salads. Varieties like Kestrel are known for their strong flavour and disease resistance, while Charlotte is popular for its firm texture.
Maincrop
- Planting Time: Mid to late April
- Harvest: September onwards (after the foliage has died back)
- Popular Varieties: Often chosen varieties are Maris Piper and Desiree
Maincrop potatoes take the longest to grow but are excellent for storing over the winter. Maris Piper is famous for its all-round cooking qualities, great for roasting and mashing. Desiree offers a creamy texture and red skin, suitable for various dishes.
Getting Your Seed Potatoes Ready: Chitting
Chitting is the process of allowing seed potatoes to sprout before planting, giving them a head start.
- Select Healthy Seed Potatoes: Choose firm potatoes without any signs of disease.
- Place in Trays or Egg Cartons: Position them with the “eyes” facing upwards.
- Store in a Cool, Light Place: A temperature around 10°C (50°F) is ideal.
- Wait for Sprouts: After 4-6 weeks, strong, green sprouts about 2-3 cm long will appear.
Planting and Earthing Up
Proper planting and care are crucial for a good potato harvest.
Preparing the Soil
- Soil Type: Potatoes prefer rich, well-drained soil that’s slightly acidic.
- Adding Nutrients: Before planting, mix in well-rotted manure or compost to boost soil fertility.
Planting Your Potatoes
- Depth and Spacing:
- First and Second Earlies: Plant 15 cm deep, spacing 30 cm between potatoes and 60 cm between rows.
- Maincrop: Plant 15 cm deep, spacing 37 cm between potatoes and 75 cm between rows.
Earthing Up

As the potato plants grow to about 20 cm tall, pile soil around the stems to form a mound. This protects developing potatoes from sunlight, which can turn them green and unsafe to eat, and encourages more tubers to form.
Watering and Mulching
- Watering: Keep the soil consistently moist, especially during flowering when potatoes are forming. Aim for about 2.5 cm (1 inch) of water per week.
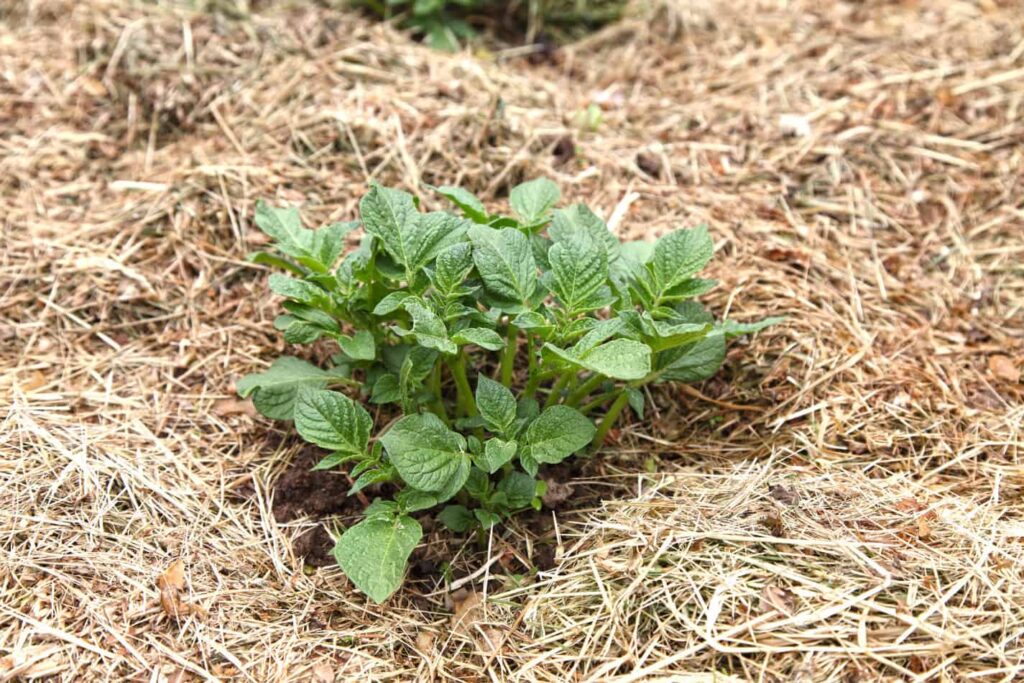
- Mulching: Apply a layer of organic mulch like straw or grass clippings to retain moisture and suppress weeds.
Common Pests and Diseases
Being aware of potential problems helps you take steps to prevent them.
Blight
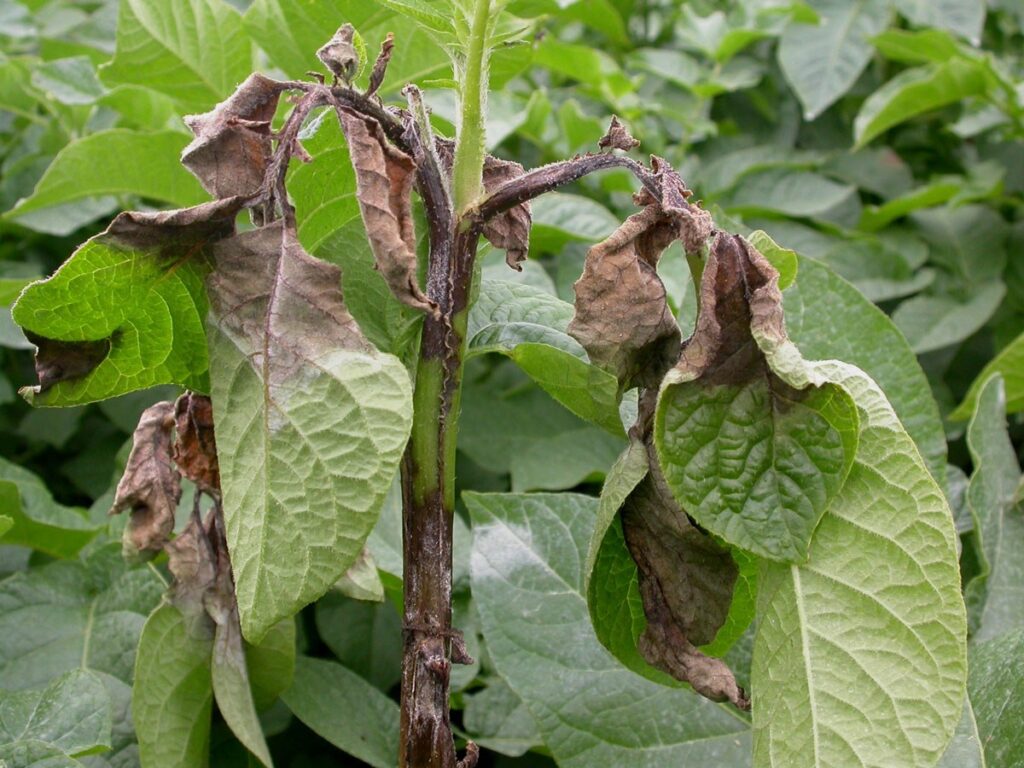
What it looks like: Brown or black spots appear on the leaves, starting as small, irregular lesions that spread rapidly. The leaves shrivel, and the plant may collapse entirely. Stems can develop dark brown lesions, and infected tubers will show sunken, dark areas with a reddish-brown rot under the skin.
What causes it: Late blight is caused by the airborne spores of Phytophthora infestans, which thrive in warm, wet weather. Spores spread quickly through the air and are washed down into the soil by rain, where they can infect tubers, leading to rot.
Are blighted potatoes safe to eat? Potatoes infected by late blight are not safe to eat, especially if the tubers show signs of rot. The blight can lead to secondary bacterial infections, causing the potatoes to decay from the inside out.
How to prevent it:
- Plant blight-resistant varieties like ‘Sarpo Mira’ or ‘Setanta.’
- Ensure good air circulation around plants to prevent moisture from lingering on the leaves.
- Water early in the morning and avoid wetting the foliage.
- Rotate crops and avoid planting potatoes in the same spot year after year.
- If blight strikes, remove and destroy infected plants immediately to prevent the spread of spores.
With proper prevention measures, you can reduce the chances of blight devastating your crop
Potato Scab
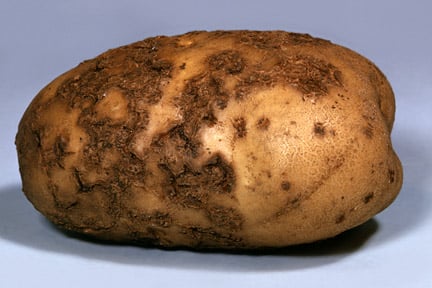
What it looks like: Rough, scabby patches on the skin of your potatoes.
What causes it: Potato scab is caused by Streptomyces bacteria, which thrive in dry, alkaline soils (with a pH above 5.5). The bacteria are more likely to infect your potatoes if the soil dries out or they don’t get regular water during the early stages of tuber growth.
Are scabby potatoes safe to eat? Yes, potatoes with scab are perfectly safe to eat. The scabs only affect the skin’s appearance and texture, not the potato’s taste or safety. You can peel or cut away the scabby parts before cooking.
How to prevent it:
- Keep your soil slightly acidic (aim for a pH between 5.0 and 5.5) to make it harder for the bacteria to thrive.
- Water your potatoes regularly, especially in the first 2-6 weeks after the tubers start growing, to reduce stress.
- Don’t use fresh manure, as it raises the pH and creates an ideal environment for the bacteria.
By managing your soil and watering properly, you can reduce the risk of scab affecting your potatoes while still being able to enjoy them if scab does occur!
Wireworms
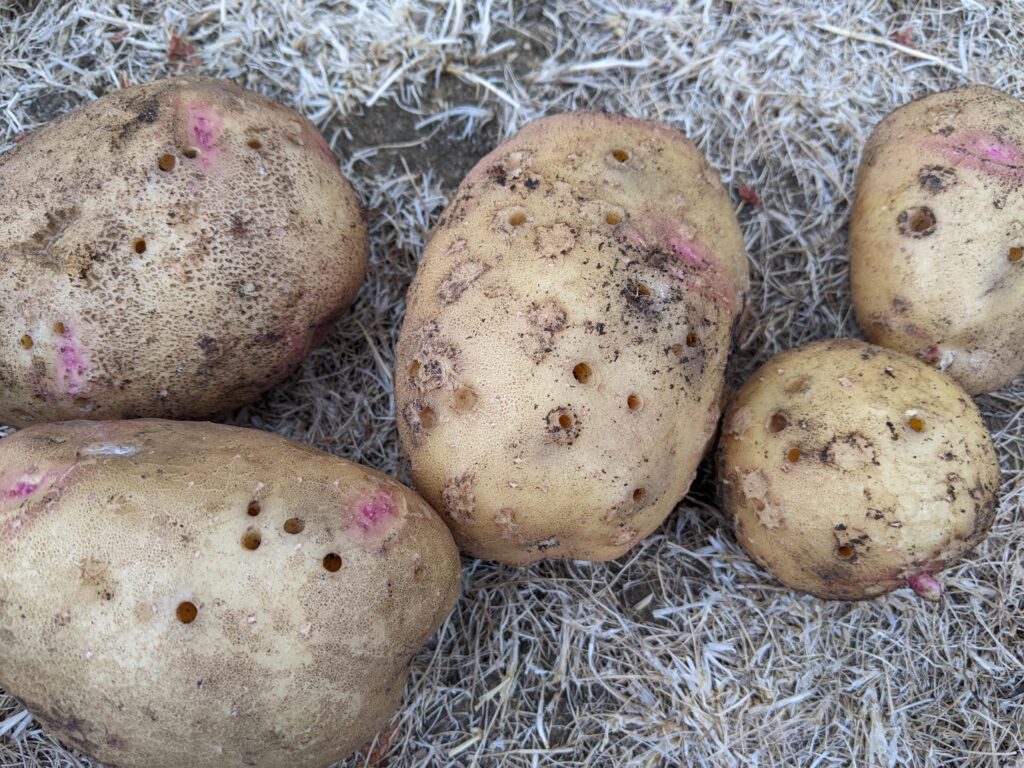
What it looks like: Small holes in the potatoes, caused by the tunneling larvae of click beetles (species Agriotes lineatus, Agriotes obscurus, and Agriotes sputator). These larvae, known as wireworms, are thin, yellow-brown, and can grow up to 25mm long.
What causes it: Wireworms thrive in soil that was previously grassland or has grassy margins. The click beetles lay their eggs in these areas, and the larvae feed on potato tubers, leaving holes as they burrow through.
Are pots a solution? Yes, growing potatoes in pots using fresh potting soil can greatly reduce the risk of wireworm damage. Since wireworms are soil-dwelling pests, avoiding infested ground by growing in containers gives you a controlled environment free from these pests
How to prevent it:
- Rotate crops to avoid planting potatoes in areas that were recently grassland or have grassy margins.
- Grow in pots to eliminate wireworms from the equation by using clean, fresh soil.
- Use traps by burying potato pieces in the soil to attract and remove wireworms.
- Expose the soil to natural predators like birds, and cultivate regularly to reduce larvae populations.
By rotating crops, using traps, and growing in pots, you can minimize wireworm damage to your potato crops
Growing Potatoes in Containers
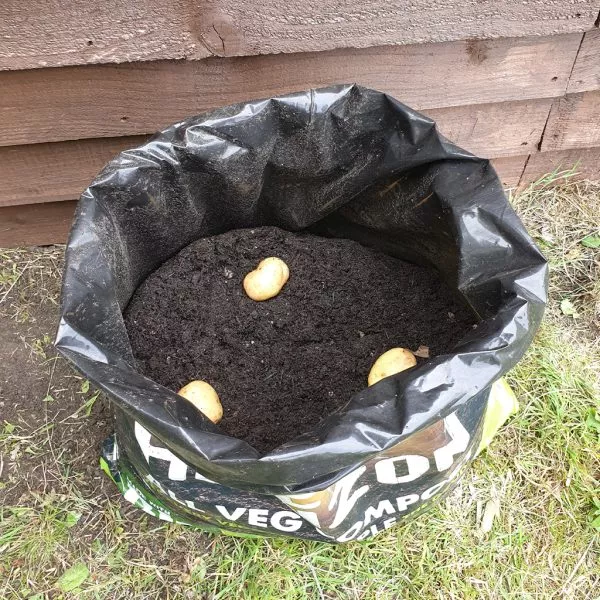
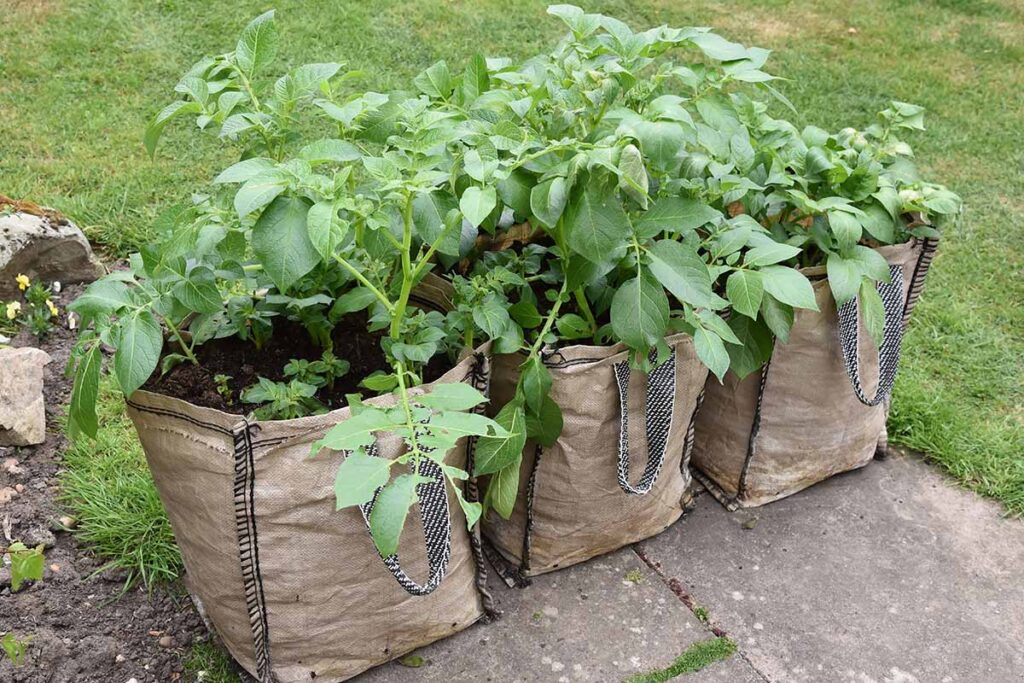
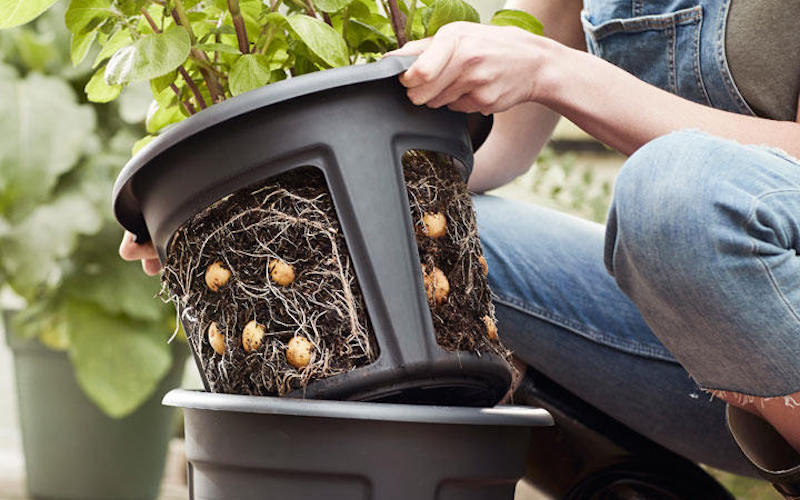
If space is limited, you can successfully grow potatoes in pots or bags.
- Choosing a Container: Use one that’s at least 30cm wide.
- Planting Steps:
- Add 10 cm of soil to the bottom.
- Place 2 or 3 seed potatoes on top depending on pot or bag size.
- Cover with another 10 cm of soil.
- Mounding Up: As plants grow, continue adding soil until the container is full.
Feeding Your Potatoes
- Fertilising: During the growing season, use a fertiliser high in potassium, like a special potato feed, to promote healthy tuber development.
I personally like to add my fertiliser at the time of sowing my potatoes my current favourite is VITAX Organic Potato Fertiliser which can be picked up on amazon.
Harvesting Your Potatoes
Knowing when to harvest ensures you get the best from your plants.
First Earlies
- When: About 10 weeks after planting, when flowers open or buds drop.
- How: Gently dig around the plant to lift the potatoes without damaging them.
- Storage: Best eaten soon after harvesting; they don’t store well.
Looking to grow First Earlies? Discover all our First Early varieties and start your potato growing journey today! See First Earlies
Second Earlies
- When: 13-15 weeks after planting.
- How: Similar to First Earlies.
- Storage: Can be stored for a short time in a cool, dark place.
Looking to grow Second Earlies? Discover all our Second Early seed potatoes at Grown Local and continue your potato growing journey today! See Second Early Seed Potatoes at Grown Local
Maincrop
- When: After the foliage has died back, usually from September onwards.
- How: Cut back the dead foliage and wait two weeks before digging up the potatoes to let the skins harden.
- Storage: Ideal for long-term storage; keep them in cloth sacks in a cool, dark place.
Looking to grow Maincrop varieties? Discover all our Maincrop seed potatoes at Grown Local and complete your potato growing journey today! See Maincrop Seed Potatoes at Grown Local
Tips for a Successful Potato Crop
- Crop Rotation: Avoid planting potatoes in the same spot each year to reduce the risk of diseases.
- Regular Checks: Inspect plants regularly for signs of pests or diseases.
- Soil Testing: Ensure the soil pH is suitable and adjust if necessary.
A Note About Our Seed Potatoes
At Grown Local, we offer premium-quality seed potatoes grown in Perth, Scotland. Scotland is renowned for producing some of the finest agricultural products, and our seed potatoes are no exception. Our seed potatoes are:
- Certified Disease-Free: Providing a healthy start for your garden or allotment.
- High-Quality Varieties: Selected for excellent taste, good yields, and resistance to diseases.
- Expertly Grown: Raised under ideal conditions for the best possible results.
Order your seed potatoes now for delivery in late January and begin your potato-growing journey with confidence.
Ready to start planting? Visit Grown Local Seed Potatoes to explore our range of premium seed potatoes and gardening supplies.
Ready to grow your own potatoes?
Choose your seed potatoes, and set them out to sprout as soon as they arrive.