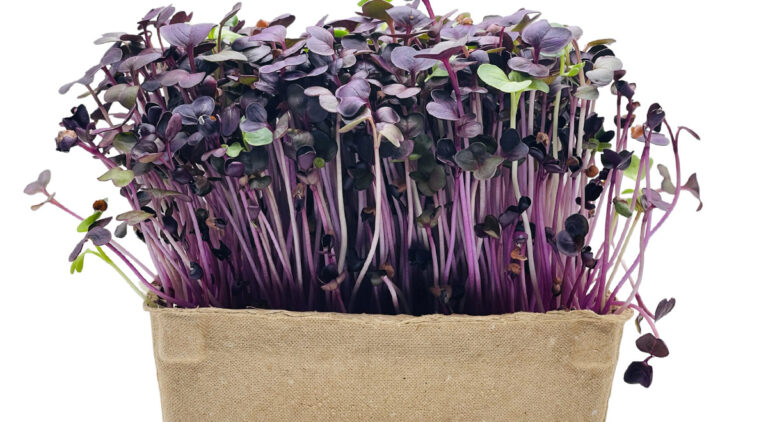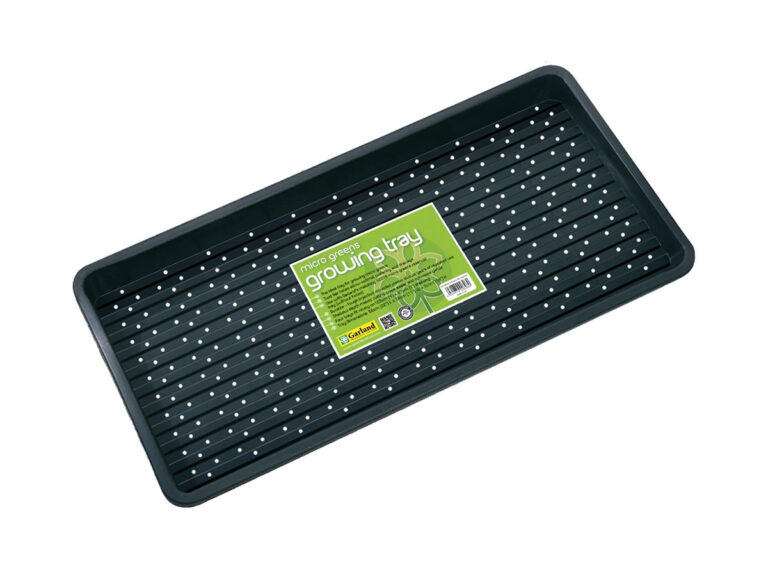
In a nutshell: scatter seeds thickly over a tray of damp compost, keep them covered and dark for a few days, then put them on a bright windowsill and water them from below. In 7–14 days, snip and eat. You can grow them all year round, indoors.
- DifficultyVery easy: a great first thing to grow
- Sow to harvest7–14 days
- WhereIndoors, on a bright windowsill
- WhenAll year round
- WateringFrom below, into a tray underneath
Before you start
What you'll need
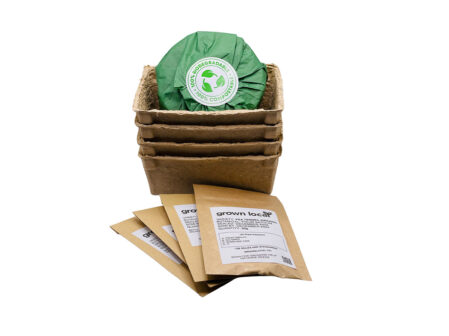
- Microgreen seeds, or our home-growing kit The kit has trays, coir and four seed varieties of your choice: everything you need to start.
- A tray with drainage holes, and one without The one with holes holds the compost; the one without sits underneath and holds the water.
- Fine compost or coir Coir is made from coconut husk, and it's clean and light.
- A cover Another tray on top, to keep the seeds dark while they germinate.
- A spray bottle For misting the seeds.
- A bright windowsill Or a simple LED grow light in winter.
- Clean scissors For harvesting.
Step by step
How to grow microgreens
Any time of year
Fill your tray
Fill the tray with holes with compost to just below the rim. Level it and press it down gently, then sit it in the tray without holes and pour water into that, until the surface of the compost is damp.
Using our kit? Soak each coir disc in about 500ml of water until it swells, then spread it evenly across the trays.
Day 1
Scatter the seeds thickly
Sprinkle the seeds evenly over the surface, much more thickly than for normal sowing: close together, but not piled up. Don’t cover them with compost.
Mist them well with a spray bottle, so they’re all damp.
Tip: As a guide, about 8g of broccoli seed covers a small seed tray (23 x 17cm), and 32g a full-size microgreen tray (56 x 28cm).
Days 1 to 4
Keep them dark
Put another tray on top of the seeds and leave them somewhere warm, around 18–21°C. In the dark, the seeds sprout together and push upwards, strong and even. This is called the blackout.
Check them once a day, and mist again if the surface looks dry.
Tip: A little weight on the top tray, like a book, helps the roots grip. It’s especially good for radish and peas.
You'll know it's working when the seeds have sprouted and are lifting the top tray, with pale yellow shoots.
Days 3 to 5
Bring them into the light
Take the cover off and put the tray on a bright windowsill or under a grow light. The pale shoots turn green within a day.
Turn the tray every day, so they grow straight rather than leaning towards the window.
Tip: Fine white fuzz on the roots is normal: it’s root hairs, not mould. See the problems below to tell them apart.
You'll know it's working when the shoots are green and standing up.
Every day or two
Water from below
Pour water into the tray without holes, and let the compost soak it up for 10–20 minutes. Then lift out the top tray and tip away any water left underneath.
Watering from below keeps the leaves dry and the stems clean, which stops them rotting.
Tip: Don’t leave the roots sitting in water: it causes rot and attracts tiny flies.
You'll know it's working when the compost feels damp but not soggy, and the shoots stand firm.
7–14 days after sowing
Snip and eat
They’re ready when they’re 5–8cm tall and their first leaves have opened. Cut them just above the compost with clean scissors.
Rinse them gently and eat them straight away, or keep them in a covered box in the fridge for a few days.
Tip: Cut only what you need: the rest carry on growing in the tray for a few more days.
After harvest
Sow the next tray
Most microgreens don’t grow back once cut, so put the used compost and roots on the compost heap, wash the tray, and sow again.
For a steady supply, sow a new tray every week.
Choosing what to grow
Which microgreens should I grow?
- BroccoliMild and fresh, with a gentle cabbage flavour. A great one to start with.
- RadishPeppery and crunchy, with pretty pink or purple stems. One of the quickest.
- Red cabbageMild, with striking purple stems.
- KaleMild and slightly sweet.
- RocketNutty and peppery, like the full-grown leaves.
- Pea shootsSweet, and taste of fresh peas. Soak the seeds overnight before sowing.
- CorianderTastes just like the herb. Slower to come up than the others.
Jargon buster
Words explained
- MicrogreensYoung seedlings of vegetables and herbs, cut and eaten one to two weeks after sowing.
- GerminateWhen a seed wakes up and starts to grow.
- BlackoutKeeping newly sown seeds covered and dark for a few days, so they sprout evenly.
- CoirA growing material made from coconut husk, used instead of compost.
- Seed leavesThe first leaves a seedling makes. Most microgreens are cut at this stage.
- True leavesThe leaves that come after the seed leaves, shaped like the grown-up plant's.
- Root hairsFine, fuzzy white hairs on the roots that help them drink. Easily mistaken for mould.
- Watering from belowPouring water into a tray underneath, so the compost soaks it up.
- Fungus gnatsTiny black flies that breed in wet compost. Harmless, but a sign of overwatering.
- BrassicasThe cabbage family: broccoli, kale, cabbage, radish, rocket and mustard.
If things go wrong
Problems and fixes
White fuzz: is it mould or root hairs?
Why: Root hairs are fuzzy, grow only on the roots, and seem to vanish when misted. Mould looks like a fine spider's web, feels slimy, and can spread over the compost and up the stems.
What to do: Root hairs are a good sign, so leave them be. Scoop out a small patch of mould along with the seedlings around it. If much of the tray is mouldy, compost it and start again.
The seeds came up patchy
Why: They were sown unevenly, dried out, or weren't kept dark for long enough.
What to do: Sow evenly and thickly, mist every day during the blackout, and keep the cover on for three to four days.
Tall, pale, floppy shoots
Why: Not enough light once the cover came off.
What to do: Move them to your brightest windowsill or under a grow light, and turn the tray every day.
The tray smells, or the shoots are rotting
Why: Too wet, too warm, sown too thickly, or not enough air.
What to do: Water from below and tip away the extra, sow a little thinner, and give them some air. Wash the trays well between sowings.
Tiny black flies around the tray
Why: Fungus gnats, which breed in compost that stays wet.
What to do: Let the surface dry a little between waterings, and never leave the tray standing in water.
Seed husks stuck on the leaves
Why: Normal, especially with radish and broccoli.
What to do: Brush them off with your hand, or rinse them away after cutting.
Good to know
Questions people ask
What are microgreens?
Young seedlings of vegetables and herbs, like broccoli, radish and peas, cut when they’re one to two weeks old. They’re full of flavour and easy to grow indoors all year. Read more about microgreens.
Are microgreens the same as sprouts?
No. Sprouts are seeds germinated in water and eaten whole, root and all, after a few days. Microgreens grow in compost or coir, in the light, and you eat only the leaves and stems.
Do I need a grow light?
Not usually: a bright windowsill works for most of the year. In the darkest winter months, a simple LED grow light gives greener, sturdier shoots.
Will they grow back after I cut them?
Most won’t. Pea shoots sometimes give a second, smaller cut. For a steady supply, sow a new tray every week.
Can I use ordinary garden seeds?
Use seeds sold for microgreens, which are untreated and come in bigger amounts. Some garden seeds are coated with treatments that aren’t meant to be eaten.
More about growing microgreens
Planting
Fill your microgreen tray with compost or your chosen medium to just below the brim of the tray. Spread seeds evenly across the surface, covering as much of the soil as possible so a dense mat of micros will grow. Micros are small so you need to use a lot of seeds to get a good-sized harvest. Avoid covering the seeds with compost.
Give the seeds a thorough misting of water, being careful not to scatter the seeds. Place a second tray on top. This acts as the compost of the top. For the next couple of days, the seeds will need water and darkness to germinate.
Allow the seeds 3-4 days under blackout to germinate.
Growing
Once the germination and blackout period is completed, it’s time to take off the lid and inspect.
We do our utmost at Grown Local to source high-quality seeds, but there is huge variation between batches. Therefore, it is imperative to inspect for any early signs of mould.
Remember not to confuse root hairs for mould!
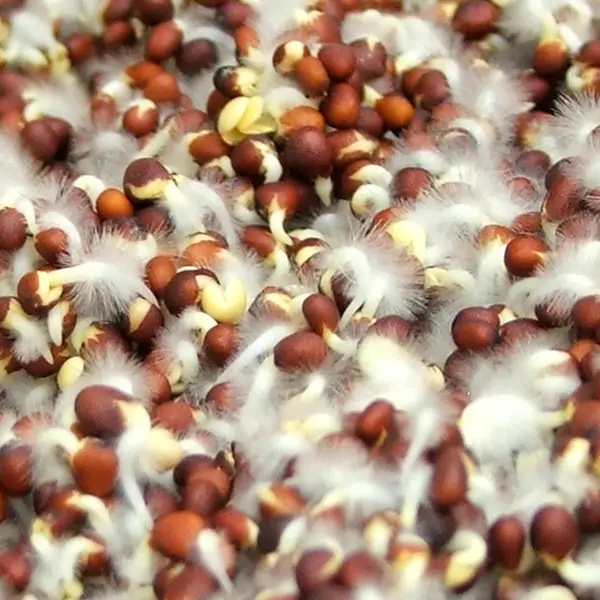
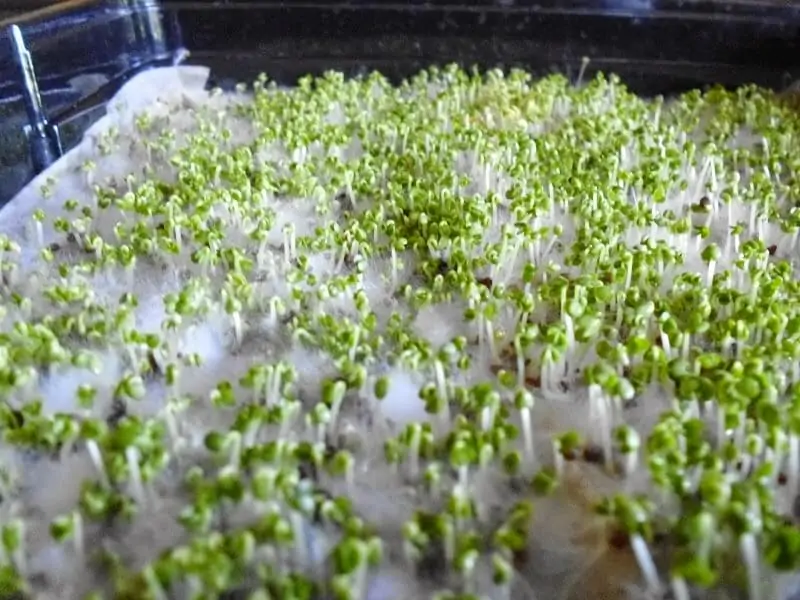
- Mould looks like a fine spider-web, root hairs are fuzzier.
- Mould is slimy if you touch it but the root airs are not.
- Root hairs only exist on the root; your mould will grow anywhere on the plant.
Don’t worry if you have mould, the tray may still be salvageable!
If you only have a small spot of mould remove the infected seed and spray with 3% food-grade hydrogen peroxide.
Continue to keep an eye on the tray and follow up with consecutive sprays of hydrogen peroxide if required.
If the tray has a substantial amount of mould, it is advisable to restart the process but before seeding, prewash your seed with 3% food grade hydrogen peroxide.
At Grown Local when required we normally leave our seed to soak for 7-10 minutes in the hydrogen peroxide followed by a rinse under clean water.
Watering
Always water from the bottom, never from the top, make sure to remove excess water from the reservoir tray after the growing medium has absorbed the maximum amount of water.
Keeping the roots submerged in water may lead to root rot or pest issues such as gnats.
Keep under lights until the microgreens under lights or on a sunny windowsill into they begin to grow a true leaf.
They should be ready to harvest in 7-14 days.
Ready to grow your first microgreens?
Our home-growing kit has everything you need, and you could be eating your first harvest within a fortnight.